
Hello all-
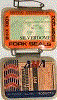
I bought this coil- https://www.speedandsport.com/product/i ... universal/ for my Super Rat. The coil on mine is intermittent and the tabs are bent and it's just not in good shape, so I decided to buy this. I'm confused on how to wire to this new coil, which has a singular tab instead of a tab for both the blue and the black wire as on the old one. I would assume the black trans case wire goes the kill switch and the blue goes to the coil, but I got this bike as is in the picture and I am not sure how it is supposed to be wired.
Here are some pictures. If someone could provide me with some instructions on where everything goes, or if the coil will work at all, I would be very grateful. Getting really close to getting my bike running.
How to Wire New Coil to Old system
How to Wire New Coil to Old system
- Attachments
-
-
-
-
-
Bullfrog

- Posts: 2799
- Joined: Mon Jul 22, 2013 4:05 pm
- Location: Oregon, 12 miles from the center of the Hodaka Universe(Athena)
Re: How to Wire New Coil to Old system
Your are correct that the black wire goes to the kill switch BUT it ALSO goes to the coil. The blue wire is the "ground" wire (which also went to the old coil . . . on the "ground" side).
I suspect your new after-market coil simply uses the laminated iron "frame" as the "ground" side of the coil. So, if it were me doing the hook-up, I'd run the black to the coil with a branch to the kill switch. And I'd run a blue wire up to the coil with an "eyelet" fitting to go on one of the coil mount bolts.
NOTE: Ideally, the kill switch should also have a "ground" wire (blue is the conventional color for ground on a Hodie) which has a good electrical connection the frame or engine (or to the same spot on the coil mount as mentioned earlier). The kill switch works by "short circuiting" the voltage in the black wire to "ground" - which "kills" spark".
Ed
Keep the rubber side down!
Re: How to Wire New Coil to Old system
The captain is correct. I connected one of these as well. Your black wire connects to the spade tab and your blue wire can be connected as a ground. I used a loop connector on the blue wire connected to one of the mounting bolts for the ground connection.
I use a 2 wire ground so I have a 3 way bullet connector on the black wire for the coil connection, the under the tank condenser connection & the kill switch connection. Then I use a 2 wire bullet connector for the blue ground wire and the ground for the kill switch.
 Victor
I use a 2 wire ground so I have a 3 way bullet connector on the black wire for the coil connection, the under the tank condenser connection & the kill switch connection. Then I use a 2 wire bullet connector for the blue ground wire and the ground for the kill switch.
1978 175SL
1976 03 Wombat
1975 Road Toad 2
1974 98 Super Rat
1974 97 Super Combat
1973 96 Dirt Squirt 2
1973 Wombat Combat
1973 Combat Wombat
1972 94 Wombat
1972 Super Squirt
1971 92B+ Ace
1970 92B Ace 100B 2
1968 92 Ace 100
1966 Ace 90
Re: How to Wire New Coil to Old system
How did you mount your coil? Did you drill holes or something in the existing bracket for the OEM one? I'm not sure ziptying it is the best ideaviclioce wrote: ↑Wed Jul 07, 2021 6:12 am The captain is correct. I connected one of these as well. Your black wire connects to the spade tab and your blue wire can be connected as a ground. I used a loop connector on the blue wire connected to one of the mounting bolts for the ground connection.
I use a 2 wire ground so I have a 3 way bullet connector on the black wire for the coil connection, the under the tank condenser connection & the kill switch connection. Then I use a 2 wire bullet connector for the blue ground wire and the ground for the kill switch.

Re: How to Wire New Coil to Old system
Take a short piece of 3/4" flat stock steel and drill it to mount to the existing mounting point and then mount your coil to it. I have found the after market coils have 5mm holes so you might need to purchase some 5mm hardware.
Dale
Re: How to Wire New Coil to Old system
I used a piece of angle aluminum to make the mount. Drilled one side to fit the coil and the 90* side to fit the mount. And yes, the holes are 5mm, not the typical 6mm for the stock coils.
And as I stated earlier, you can see the black wire on the spade connector & the blue wire grounded to the mounting bolt. This will bolt directly to the Super Rat coil bracket. Victor
And as I stated earlier, you can see the black wire on the spade connector & the blue wire grounded to the mounting bolt. This will bolt directly to the Super Rat coil bracket.
- Attachments
-
-
1978 175SL
1976 03 Wombat
1975 Road Toad 2
1974 98 Super Rat
1974 97 Super Combat
1973 96 Dirt Squirt 2
1973 Wombat Combat
1973 Combat Wombat
1972 94 Wombat
1972 Super Squirt
1971 92B+ Ace
1970 92B Ace 100B 2
1968 92 Ace 100
1966 Ace 90
Re: How to Wire New Coil to Old system
Next question. What did this conversion do for the quality of the spark, as seen at the sparkplug?
Re: How to Wire New Coil to Old system
Currently can't see a spark, but I can definitely smell the wires in the magneto(I wouldn't say its bad-my collection of 70 year old electric trains does the same). What is wrong with my setup? Also my original spark plug had the top cap gone so I had to harvest one from my push mower. They look a little different.
- Attachments
-
-
Bullfrog
- Posts: 2799
- Joined: Mon Jul 22, 2013 4:05 pm
- Location: Oregon, 12 miles from the center of the Hodaka Universe(Athena)
Re: How to Wire New Coil to Old system
I don't think we've heard anything about the condition of your points or condenser.
Let's see if your previous coil is still "intermittant". The intermittent spark may not have been caused by the high voltage coil.
Ed
Let's see if your previous coil is still "intermittant". The intermittent spark may not have been caused by the high voltage coil.
Ed
Keep the rubber side down!
-
Bullfrog
- Posts: 2799
- Joined: Mon Jul 22, 2013 4:05 pm
- Location: Oregon, 12 miles from the center of the Hodaka Universe(Athena)
Re: How to Wire New Coil to Old system
PS: 1) The wiring appears to be correct to me.
2) Try disconnecting the kill switch - it may be faulty - and may be killing the spark.
Ed
2) Try disconnecting the kill switch - it may be faulty - and may be killing the spark.
Ed
Keep the rubber side down!
Re: How to Wire New Coil to Old system
I also mounted the coil 180 degrees from how you have it mounted. You’ll need to be sure nothing arcs against the under side of the tank tunnel with that “unusual angle.’’ And depending on the condition of the paint, you might want to strip some paint off the frame where the mount makes contact, just to get a better ground. Victor
1978 175SL
1976 03 Wombat
1975 Road Toad 2
1974 98 Super Rat
1974 97 Super Combat
1973 96 Dirt Squirt 2
1973 Wombat Combat
1973 Combat Wombat
1972 94 Wombat
1972 Super Squirt
1971 92B+ Ace
1970 92B Ace 100B 2
1968 92 Ace 100
1966 Ace 90
Re: How to Wire New Coil to Old system
So do you have the coil hanging down from the frame? Or is your plug wire facing the front instead?viclioce wrote: ↑Sat Jul 10, 2021 6:48 am I also mounted the coil 180 degrees from how you have it mounted. You’ll need to be sure nothing arcs against the under side of the tank tunnel with that “unusual angle.’’ And depending on the condition of the paint, you might want to strip some paint off the frame where the mount makes contact, just to get a better ground.
As far as paint goes, the frame paint is extremely fresh under there so that might be it.
Before wiring everything up I was sure to test the wires out of the magneto for working points(using ohm meter). They definitely worked- while turning the flywheel I'd get a "tick" going either way each time showing that they were hitting. However I took the flywheel off so here's what I have. I'm pretty sure everything's there but here's pictures. I also have this mystery electrical part that I can't find on any diagrams. It was in my box of parts that came with the bike
- Attachments
-
-
-
-
Bullfrog
- Posts: 2799
- Joined: Mon Jul 22, 2013 4:05 pm
- Location: Oregon, 12 miles from the center of the Hodaka Universe(Athena)
Re: How to Wire New Coil to Old system
You don't have to worry about the mystery part - it is not Hodaka.
I'd still like to simplify your test. Eliminate the kill switch. Black wire from magneto to high tension coil. Blue wire from high tension coil laminated core (make sure there isn't an insulating "clear coat" on the core where you make contact) back to the blue wire at the magneto. Check for spark.
Ed
Keep the rubber side down!
Re: How to Wire New Coil to Old system
you have some black electrical tape holding the wires together [ condenser and points ] maybe look and see if there's a mess there
Re: How to Wire New Coil to Old system
I sanded the flywheel and the coil core armature plates in case of contamination. They were quite dirty. The crank key was quite beat up so I'm waiting on that to come in before giving it another go
Also the flywheel definitely was rubbing against the coil core ends. I know this is a problem but how does one fix it? There's always buying a new core but I think that you can somehow adjust the ends to within not too close but not too far from the flywheel.
Also the flywheel definitely was rubbing against the coil core ends. I know this is a problem but how does one fix it? There's always buying a new core but I think that you can somehow adjust the ends to within not too close but not too far from the flywheel.
-
Bullfrog
- Posts: 2799
- Joined: Mon Jul 22, 2013 4:05 pm
- Location: Oregon, 12 miles from the center of the Hodaka Universe(Athena)
Re: How to Wire New Coil to Old system
Usually, rubbing on the ends of the coil cores is an indication that 1) the flywheel was not properly seated on the taper or 2) the stator plate was not properly seated into position.
Ed
Ed
Keep the rubber side down!
-
taber hodaka
- Posts: 2242
- Joined: Mon Jul 29, 2013 6:34 pm
Re: How to Wire New Coil to Old system
I loosen the screws pull the core towards the center and tighten the screws. ----- Clarence
Re: How to Wire New Coil to Old system
Beat up flywheel key sure sounds like Ed is on the right track, (as always) about the flywheel seating on the crank.
Little details
- make sure the screws holding the primary coil to the plate are not slightly bent from a previous mishap, they are long and thin and bend easily if they get smacked. If they are not straight they can cause the coil to go a bit eccentric when you tighten it down. I've actually seen that damage before as a result of a flywheel loosening up, on various bikes.
- the two screws holding the plate are slotted, not Phillips, not original as far as I know. If the taper on the screws heads doesn't match the stock taper the the plate might work loose.
-Stever
Who is online
Users browsing this forum: No registered users and 14 guests